
Introduction
In our last post,“Zapier Automation: The Basics”, we explored what an automation is and why it matters. Now it’s time to get your hands dirty. This guide walks you through building your very first Zap: an automation that moves new contact‑form submissions straight into Google Sheets. No copy‑and‑paste, no code, no missed leads.
Recap of Automation Basics:
Remember, automation with Zapier revolves around a simple yet powerful concept: WHEN something happens in one app (the Trigger), DO something in another app (the Action). This foundational principle underpins every Zap you’ll create, turning repetitive tasks into automated sequences.
Conceptualizing Your Automation Need:
Before diving into the technicalities, it’s crucial to pinpoint the task you’re aiming to automate. Consider a common scenario: a contact form on your website that garners inquiries. The manual transfer of each submission into a Google Sheet not only is time-consuming but also prone to errors. This is where Zapier steps in, offering a seamless solution to automate this process.
Understanding Your Automation Needs:
To build an effective Zap, clarity on what you’re trying to achieve is crucial. Consider a scenario where you have a contact form on your website. Manually transferring each submission to a Google Sheet can be tedious. This is where Zapier comes in, automating this process for you.
Step-by-Step Guide to Creating Your First Zap:
First of all, ensure you have a Zapier account. Signing up is simple and offers a free tier to get you started on your automation journey.
1) Deconstructing the Automation Process:
To construct your Zap effectively, break down your automation need into manageable components:
- Identify the Apps: Recognize the applications involved in the process, such as your form application and Google Sheets.
- Define the Trigger: Determine the event that will initiate your Zap, like a new form submission.
- Outline the Action: Decide on the task your Zap will perform, such as adding the submission details to a spreadsheet.
- Determine the Data Transfer: Specify the information that needs to be moved between the apps, such as the contact’s details and their inquiry.
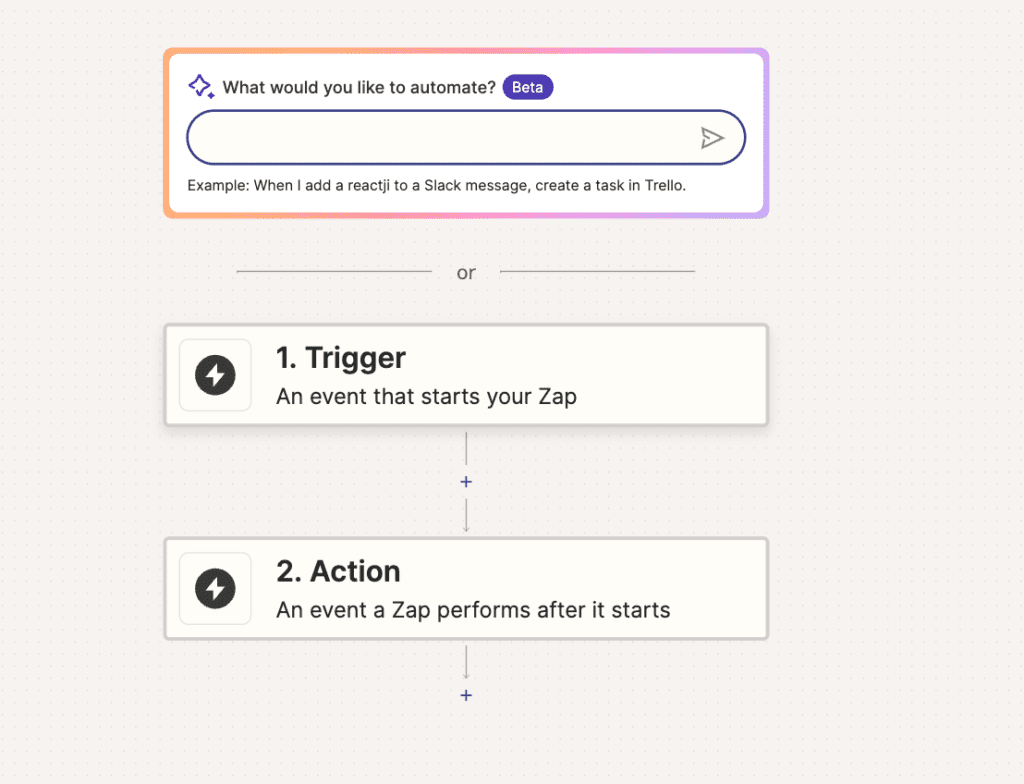
2) Start Building Your Zap:
- Log into Zapier and initiate a new Zap. The Zap editor is where you’ll create new Zaps and edit existing ones.
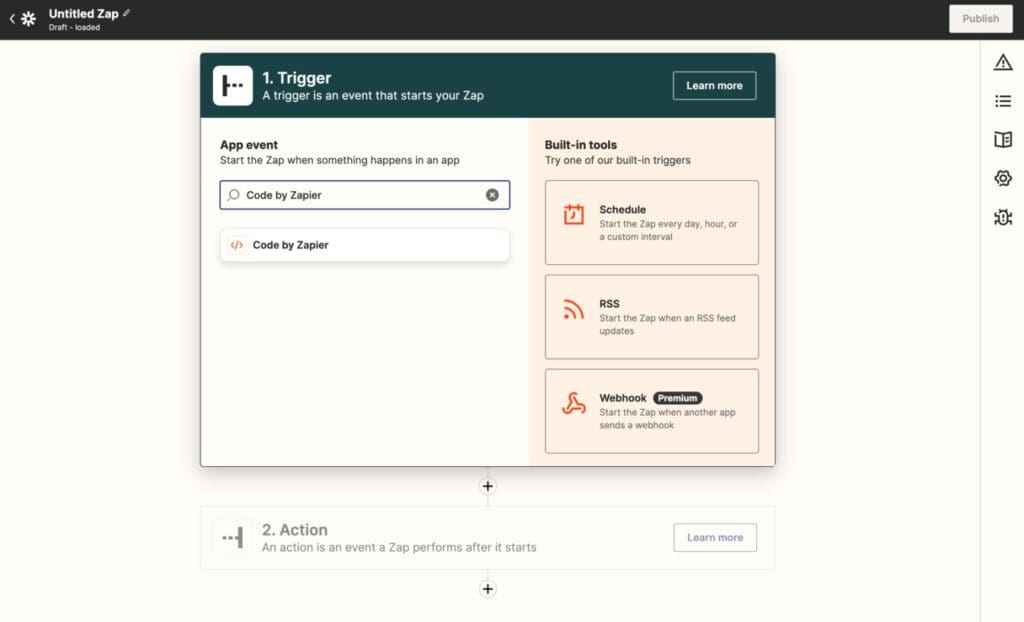
- Select your form app (e.g., Typeform, Google Forms) as the trigger app and define the trigger event, like “New Submission.”
3) Configuring the Trigger:
- Connect Your Form App: Zapier will prompt you to log in to your form app to establish a connection.
- Specify the Form: Choose the specific form you’re using for submissions.
- Test Your Trigger: Zapier will test the trigger by looking for a recent submission. Ensure you have at least one test submission in your form for this step.
Remember: A trigger starts your Zap. (Think of it as the WHEN of any automation.)
4) Setting Up the Action:
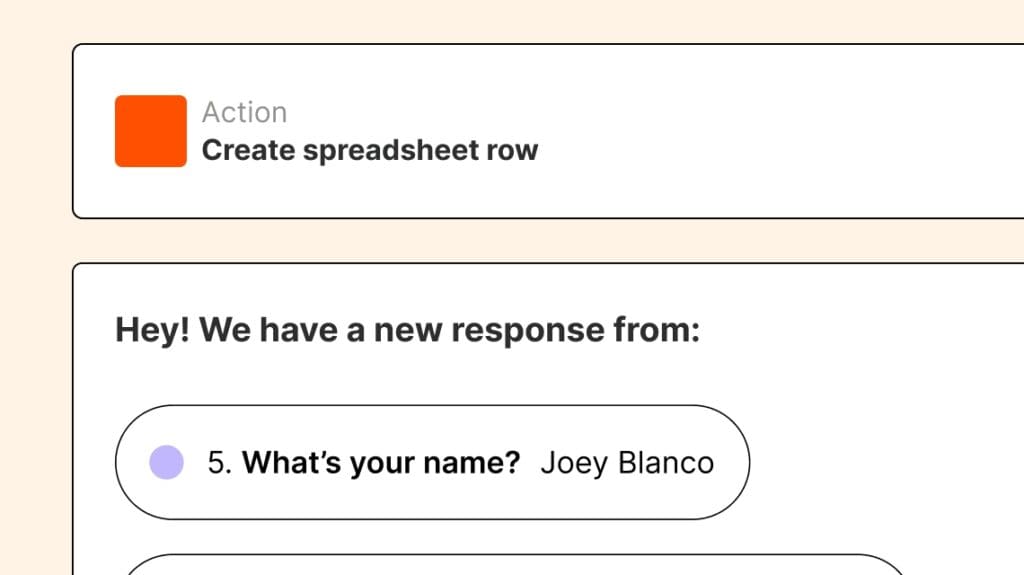
- Select Your Action App: Choose “Google Sheets” as your action app.
- Choose the Action Event: Typically, this will be “Create New Row” or a similar option.
- Connect Your Google Sheets Account: Log in to Google Sheets when prompted and grant the necessary permissions.
The action is the DO part of your automation. Actions are the events you want your Zap to perform after your trigger occurs. Without an action, you don’t have a complete Zap.
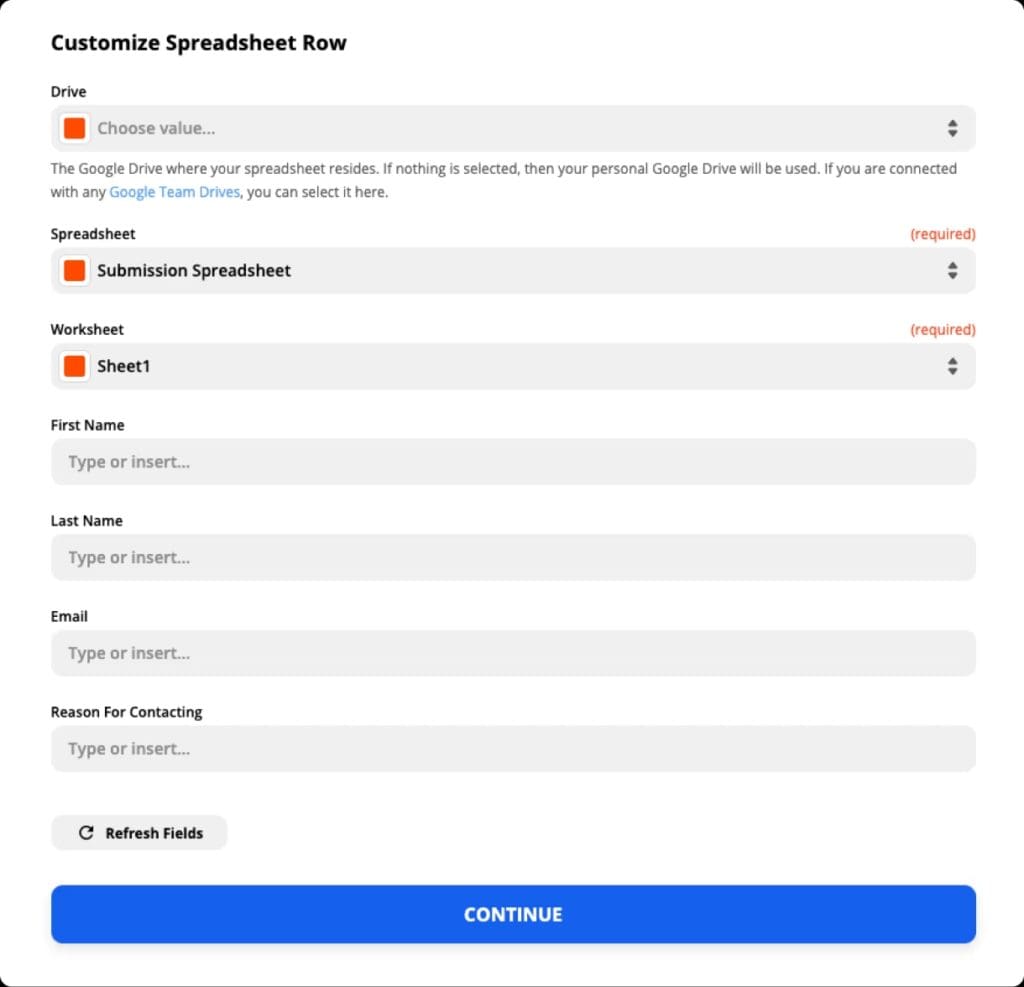
5) Customizing the Action:
- Select the Spreadsheet and Worksheet: Choose the Google Sheet and the specific worksheet where you want to store the form submissions.
- Map Your Data: Align each piece of data from the form (e.g., name, email, message) with the corresponding column in your Google Sheet. Zapier will show you fields from your form submission to map to spreadsheet columns.
6) Test Your Action
- Run a Test: Zapier will create a new row in your Google Sheet with the test data from your form. Check your Google Sheet to ensure the data appears correctly.
- Adjust if Necessary: If the data doesn’t look right, go back and adjust your field mappings until the test is successful.
7) Activate Your Zap
Once you’re satisfied with the test, click the “Turn on Zap” button. Your automation is now live, and future form submissions will automatically populate your Google Sheet.
8) Monitor and Adjust
Keep an eye on your Zap’s performance. Make adjustments as needed, especially if you make changes to your form or Google Sheet.
Conclusion
With your first Zap now up and running, you’ve taken a significant step towards automating your workflows. This practical experience builds on the foundational knowledge from “Zapier Automation: The Basics,” empowering you to explore further automations that can save time and reduce manual errors. As you grow more comfortable with Zapier, the possibilities for automation will expand, enabling you to focus on more strategic tasks.